20th March 2026
For years, home insulation has been a priority for property owners. Today millions of people have insulated homes, with the numbers continuing to grow. It’s all very well installing insulation, but even more important to maintain it properly. This is so that you can maximise its performance and prolong its lifespan.
Begin by looking after your insulation following any repairs or if you’ve recently installed new insulation.In our guide, we explore the many ways you can give your insulation good aftercare, ensuring your home is well-insulated and energy-efficient for years to come.
Table of contents
- What problems can occur with my insulation?
- Can I repair insulation myself?
- How can I prevent insulation issues in future?
- Who to contact with your insulation installation concerns
- I rent my home; can I still get support?
- Is there anything else I can do?
What problems can occur with my insulation?
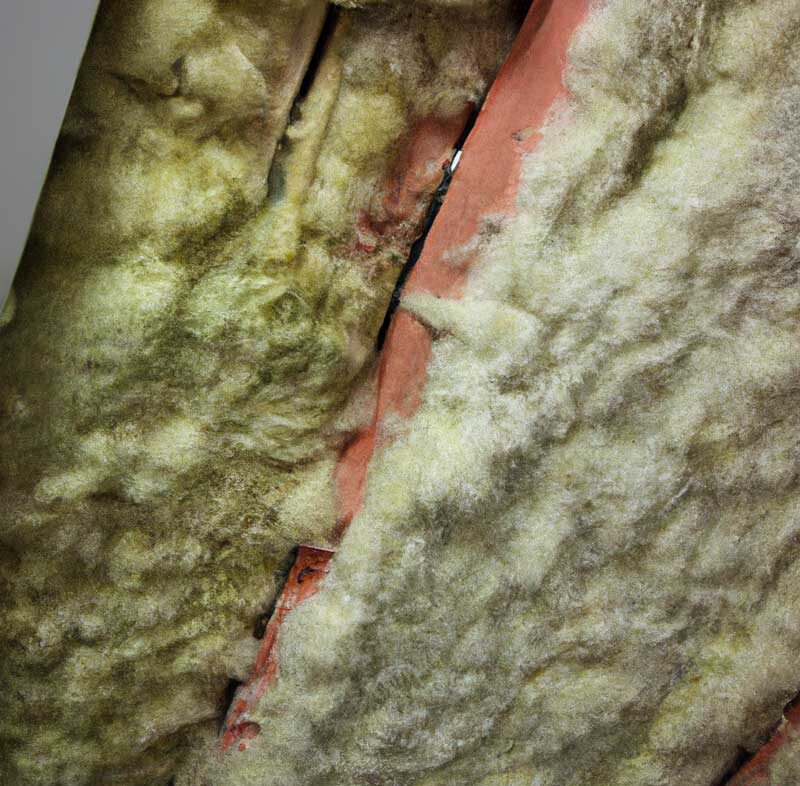
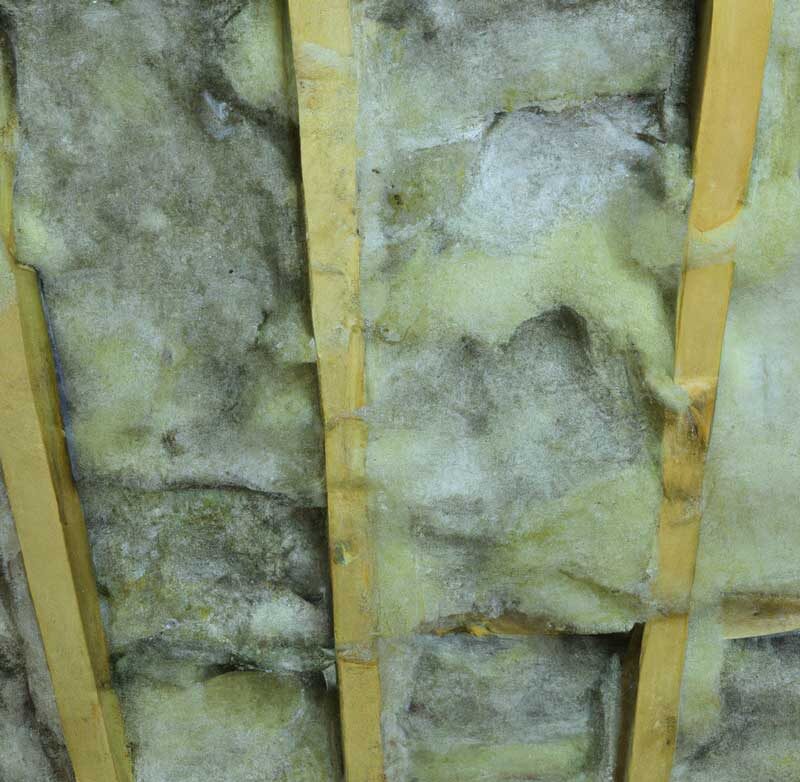
One of the most common issues, especially with cavity wall insulation, is dampness and mould. However, other issues can occur. That is why you should inspect insulated areas at least once a year. These inspections will include looking for:
- Cracks
- Distortion
- General damages or dust build-up
- Corrosion
- Hot spots (high-temperature systems)
- Condensation and ice build-up (low-temperature systems)
What types of insulation are affected by these issues?
Here are three main insulations that are at risk of damage.
Cavity wall insulation
As mentioned, cavity wall insulation can fall victim to any number of the problems we touched on above. The same can be said for other forms of insulation. However, the issues you will come up against largely depend on the insulation in your property. We’ll explain more about this as we go on.
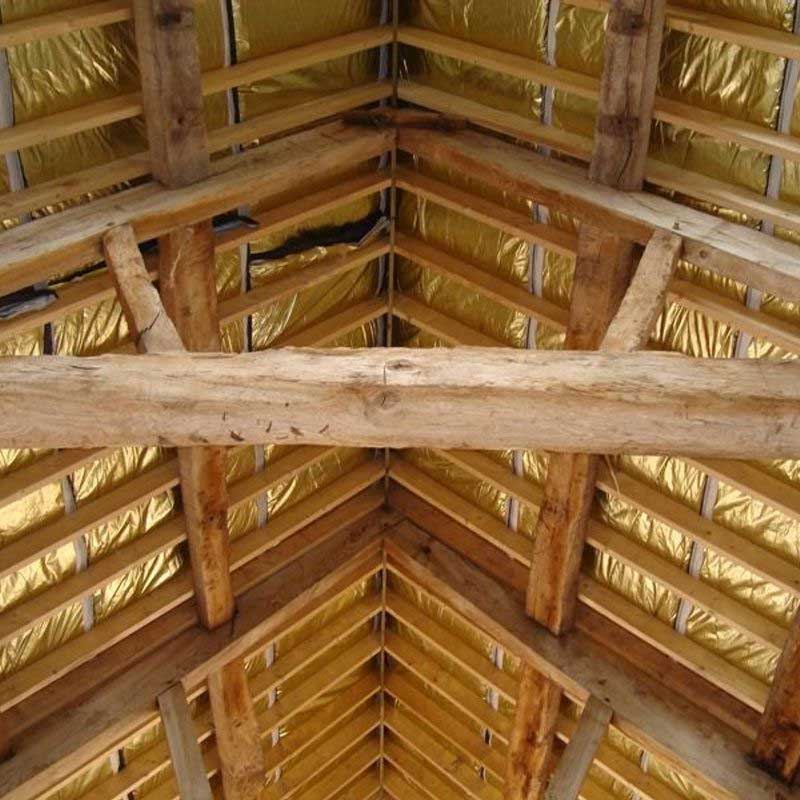
Foil insulation
For example, if you have foil insulation (also known as reflective insulation), this type of insulation typically needs to be kept clean of dust and debris. Not doing so heightens the risk of multi-foil insulation problems, including damage to the insulation that it is combined with when installed in parts of your home, such as under your roof.
Insulation boards
Alternatively, if you have installed insulation boards between and over the rafters of your roof, dampness can affect it. This depends on the quality of the roof and when you installed your insulation. This leads us nicely to a common question amongst many homeowners.
Does insulation cause damp?
The insulation itself is not actively making the area damp. However, at least four possibilities exist for why your insulation may be sucking up moisture which we will expand on later. If your insulation was installed by a creditable fitter, these issues should have been spotted before the fitting. However, if problems pop up after fitting the insulation, you must find a way to fix them.
After fixing the problems, contact a specialist. They will need to look at the insulation to check it’s in good working condition and confirm if any existing water build-up can dry out.
There was already an existing damp issue which was made more apparent by the insulation.
Some issues can go unnoticed until something new takes its place. For example, if you did not notice a gutter leaking into a cavity, the cavity wall insulation now acts as an inner leaf of the wall.
The insulation was poorly installed.
Cowboy builders or poor DIYers might not have taken proper precautions when installing external wall insulation. One example is that the insulation has been crossed over the damp-proof course. This is a barrier that sits above ground level and allows dampness to rise through the walls when obstructed.
A new damp issue began to occur during the installation of the insulation.
Anything can happen during a fitting; that includes the appearance of new structural issues. In this case, if there wasn’t one before, a new damp issue has entered at the wrong time. A way to rule this out is to look out for common factors that may have caused dampness to occur, not related to the insulation. These factors are as follows:
- Gutters have been blocked or damaged.
- Downpipes have been blocked or damaged.
- Roof tiles or roof slates have gone missing.
- Flashing is missing or damaged.
- The ground levels outside the home are higher than the damp-proof course.
- Faulty doors or windows.
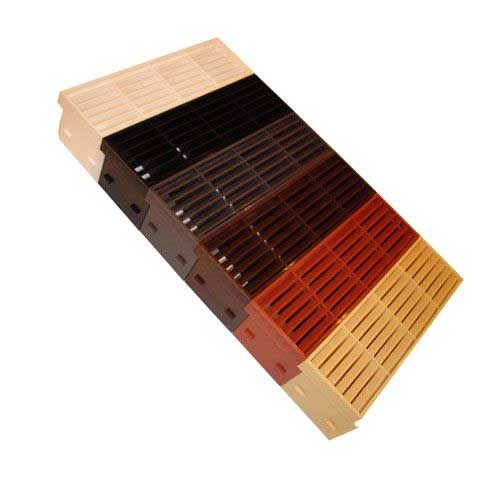
- Air bricks or ventilation has been obstructed (air brick examples below).
- The bricks, pointing or render are damaged.
- Leaks in the plumbing.
- Moisture production is excessive (e.g. drying clothes on a clothes horse indoors).
The property wasn’t suited for the insulation installed.
Specialists should have performed tests before the fitting to ensure you can install the insulation in the desired spot. If they weren’t, issues occur quickly down the line. An example of this is if the elevation of the location was too exposed to rain and other weather for a cavity wall of a normal standard.
Can I repair insulation myself?
Certain insulation repairs are possible if you have confidence in your DIY skills. This is also a great benefit as it can reduce installation costs when done by yourself, but it will depend on your understanding of thermal values. You can discover more about thermal values via our insulation buyer’s guide, where you will also discover how to insulate different locations (such as the shed, walls, garages and more).
So, if you’re wondering ‘Why is my loft damp?” you might want to look into it more closely. Remember, damp insulation isn’t limited to roof insulation, which is why it can be a major concern for most property owners. So, if you’ve had floor insulation, solid wall insulation or cavity wall insulation installed, it’s best to identify and sort this issue as soon as possible.
Found air leaks? Seal them off
If you’ve found areas where the air is making its way into the property, you can seal these off quite easily. How you seal the area will depend on the position of the air leak.
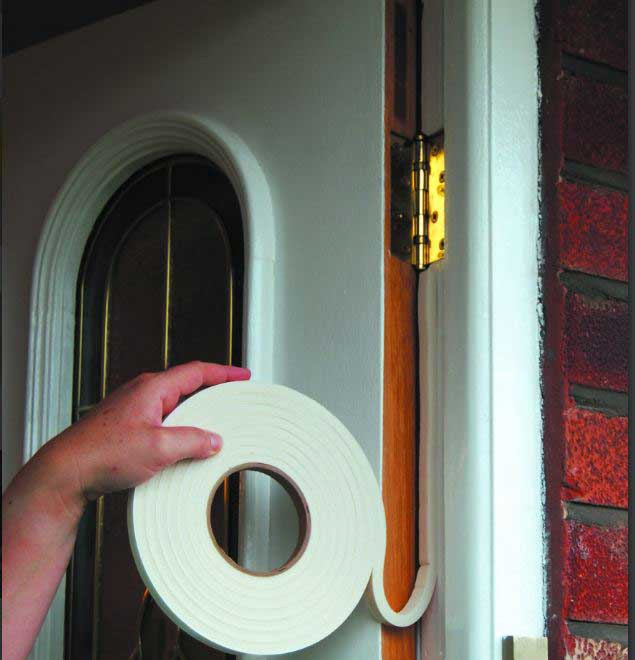
For windows, doors, around ducting and plumbing and electrical wiring, opt for caulk and weatherstrips. Weatherstrips are one of the easiest and most common ways to weatherproof doors and windows. You can discover various weatherstrips amongst our variety of draught excluders. Alternatively, if you opt for caulk, installers apply this using a tube with a nozzle. If the old caulk is in the way, they can easily remove it using a flathead screwdriver or a knife.
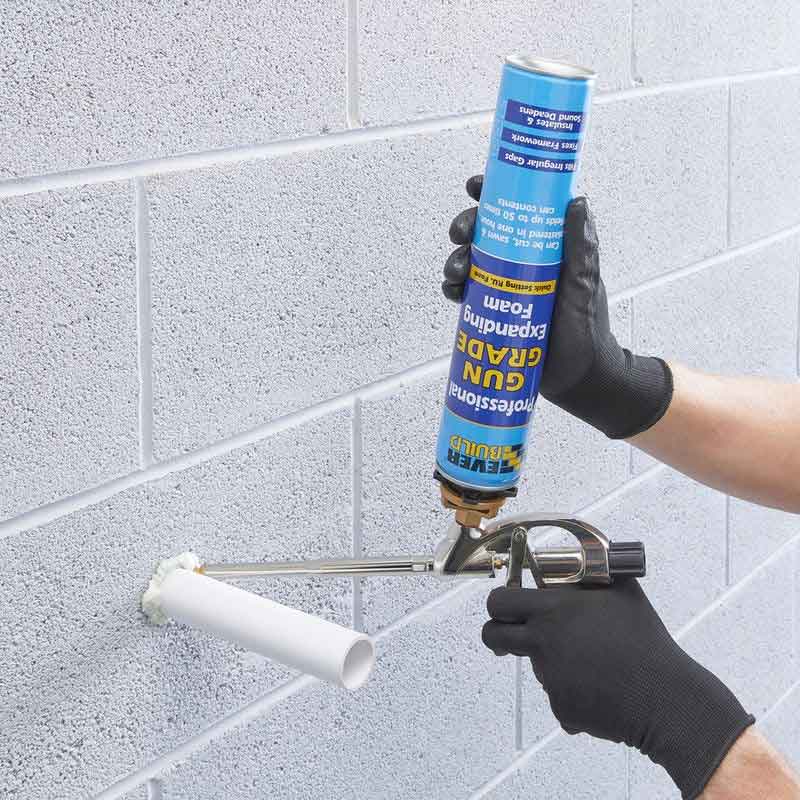
When there are large air leaks, opt for foam sealant. This is desirable when there are perhaps cracks around the house. Many foam sealants expand to fill the space as desired, ensuring no air can escape into the property.
Now for chimneys, furnaces and gas-powered water heater vents, you’ll want to look for a fire-resistant sealant. Something like furnace cement caulk is ideal, though anything similar that can withstand high temperatures (check the label!) is important since the material will be exposed to boiling temperatures.
Careful now, the vents might be blocked off!
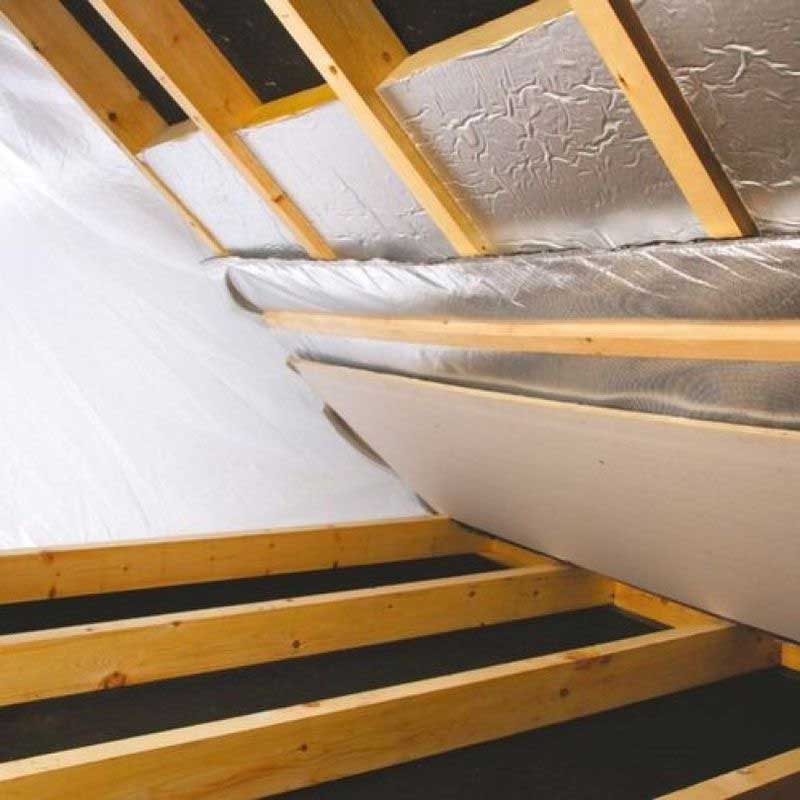
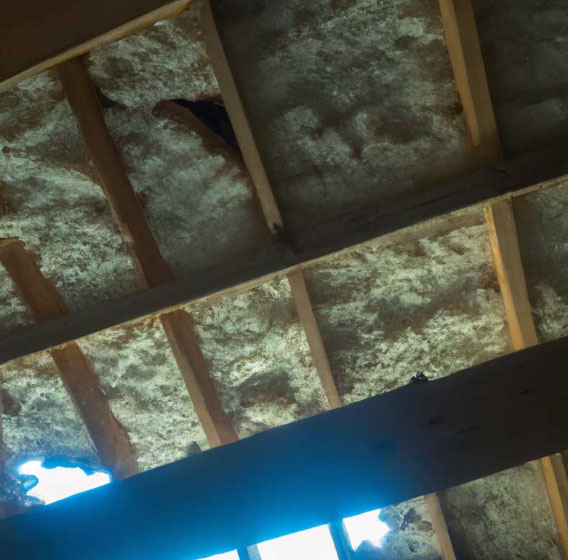
If incorrectly installed, the insulation might block the vents (likely soffit vents), especially in the loft space. This can prevent the airspace from being ventilated properly and encourage poor air quality.
Other indications of poor ventilation are as follows:
- Water stains on the ceiling (caused by leaks and poor ventilation).
- Ice build-up at the roof’s edge (also known as ice dams) stops snow from draining off when melted; causing leaks into the property and causing damage to the roof and damp insulation.
- Mould and mildew build-up.
You can adjust the insulation with suitable PPE (including gloves, mask and goggles) and efficient DIY skills.
- Using a ladder, climb to the soffit vents and remove the covers to check inside.
- With your gloves on, pull loose insulation out of the vents and dispose of it in a suitable bag or container.
- Using a tape measure, check the room between the soffit vents and insulation. If there is still too much insulation near the vent, cut away the excess.
- Refit the vent cover; your task is complete.
- (optional) Improve the setup of your insulation. For example, plywood strips can be an excellent way to keep the insulation away from the soffit vents. These are nailed between the ceiling joists, creating a box that ensures your ventilation is free from blockages.
Contact a professional if unsure or do not have the proper preparation kit, as breathing in materials (such as the fibres of fibreglass wool insulation) can damage your health.
You can also adjust your insulation if obstacles are getting in the way, such as pipes. Using a utility knife, cut a notch in the insulation (this is easier with insulation rolls) to fit the product around the obstacle for a flat fitting. For corners, don’t squash the insulation into the space. Instead, roll out loft roll insulation to provide an even fitting. This ensures it can perform efficiently and look better in the long term.
The insulation is installed too closely to the light fixtures
Some loft spaces have light fixtures in place. If insulation is too close to this, it could get hot and become damaged. As such, whether the insulation is already burnt or not, ensure you use a utility knife to cut away the insulation close to the fixture. A distance of at least three inches between the insulation and the fixtures is suitable.
Your insulation plasterboard is damaged; it’s time for a quick fix
Plasterboard is a favourite amongst many homeowners. If you’re DIY, you’ll need to know how to cut and dispose of plasterboard before fixing anything. Once you know that, here’s what you do!
Step one: Mark the area of damage on the board using a rectangle shape. Then, take your straightedge and keep a one-to-two-inch gap between the rectangle’s edges and the damaged section of the board.
Step two: Now hold the straightedge against one of the lines of the rectangle and cut through the board using a utility knife. Repeat on each side of the rectangle. You can now remove the damaged section of the board by prying it out with a flat-head screwdriver along the cut lines.
Step three: Using the removed piece of board as a guide, cut the foam board to match it as a replacement. Then, apply Styrofoam adhesive.
- If applying in a roof area, put adhesive on the sides.
- For a basement, apply the adhesive to the board’s back.
Step four: Once ready, slot the new plasterboard section in place. Use jointing tape to cover the joints between the fitted board and the new board to secure it in place while sealing the joints.
Do you really have enough insulation?
During your inspections, you might notice you’re missing out on insulation in vital areas of the property. As such, note these areas and install the insulation needed to ensure a working system. Believe it or not, you can also have too much loft insulation, depending on the property. Our guide to too much loft insulation explains why.
You can also check insulation levels via electrical outlets for exterior wall insulation. To do this, turn off the power to the outlet at the circuit breaker. Then remove the outlet’s cover and, using a torch, investigate the space around the box. This should allow you to view any insulation installed. You can repeat this process for each room in the home, with notes made to check whether any insulation requires topping up or if there is none.
How can I prevent insulation issues in future?
The best way is to inspect the areas you insulate thoroughly. Look for clear signs of damage (if any) and opt for repairs.
Any building work, not just insulation, requires thorough checks of whom you employ. So, make sure not to be apathetic about the process and instead look for quotes from different installers.
Don’t be swayed by high discounts or pressured into signing on the day you speak to the installer. It’s worth reading trustworthy reviews or speaking to people with previous success with the companies. Ensure that a third-party guarantee covers a suitable length of time, and verify that the installer belongs to a trade association (e.g., CIGA or SWIGA).
Here are common areas where leaks are possible:
- Attic floors and doors.
- Soffits that have dropped.
- Vent fans and dryer vents.
- Crawl spaces.
- Outdoor faucets.
- Duct registers.
Who to contact with your insulation installation concerns
If none of the issues above seem to be the cause of the damp or damage and you think the installation has been a problem, there are a few people you could contact for help.

Contacting your insulation installer
Many installers will offer to check the problem and look for the cause. If they find the problem is a result of installation, they may offer to deal with it. However, troubles between you and the dealer could occur, if:
- The business is defunct.
- Their site is difficult to locate.
- They’re not helpful or they say no.
If any of these things are preventing you from finding a fix, there are other ways you can try to deal with the issue.
See if you have an insulation guarantee
You may think, “But the business isn’t around anymore.” Well, listen up, as you might be surprised why this could still be a solution.
Many types of insulation nowadays, especially wall insulation, are typically presented with a long-term guarantee. One is provided not by the installer but by another party. That means you could still get the help you need even if the initial fitting company has shut down.
CIGA (the Cavity Insulation Guarantee Agency) is one such agency that has been providing cavity wall insulation guarantees, independent from the installer, for decades. Like SWIGA (the Solid Wall Insulation Guarantee Agency), which offers the same service for solid wall insulation. Then there are insurance companies who provide guarantees for many different insulations.
If you find a guarantee lying around, check for details regarding who to speak to about the problem. If there are no contact details, but you think an independent or extended guarantee is likely what you’ve been provided, see if any schemes have a record of your property.
Important note: The guarantee will only support you if the problem is due to poor work carried out by the installer. If there is an alternative cause of the dampness (e.g., the building has not been maintained correctly), your guarantee will not cover this. Though the provider may offer advice to fix the problem.

Contacting your funder
Your insulation may have been funded through a scheme. If you’re unsure who funded your insulation installation, contact your local council or energy supplier. On the chance that they’re not sure of the answer, try contacting larger energy suppliers who were performing installations during your own.
Contacting the installer’s trade association or accreditation scheme
The likelihood of the installer being part of a trade association or accreditation scheme is higher nowadays. This is helpful because they will have rules in place for their members. If the guidance from this membership has clearly been broken, the organisation might be able to provide help. To find out if the installer has a connection to an organisation, look at the paperwork provided to you by the installer (e.g. leaflets or professional documents such as letters). You can also check out their website, as many modern-day companies usually have a logo referencing their affiliated organisation.

I rent my home; can I still get support?
Whether renting privately, via the council or through a housing association, your landlord should be the first point of contact. They are responsible for fixing problems like dampness, unless you caused the issue. If they don’t/won’t offer to help, contact your local council regardless of if you’re renting privately and ask for some further assistance.
Is there anything else I can do?
Failing the above, you do have other options. Such as speaking to a material supplier or industry body for advice and support. However, if you don’t have a guarantee, installer support or a scheme funder to help, there are two things to do.
Option one: Speak to another company to fix the issue
Sometimes other companies will be willing to fix the issue. Costs can vary greatly, but looking quote comparisons is the best way to improve your chances of finding support.
Option two: Pursuing the legal route
The last resort is going down the legal route. You must speak to bodies such as Citizens Advice before moving forward and find out if this is a viable option for you to solve the problems you’re faced with.
Need more advice about your insulation? We’ve got plenty of guides to help you find the right insulation for your property, including how to install loft insulation, insulating a conservatory and much more.

Was this guide useful?
Mentioned in this project guide: