20th March 2026
Fake ceilings have become a common feature across a wide range of industrial and commercial applications, from hospitals to libraries. Given their multiple advantages, it’s no surprise that false ceiling installation is now becoming a common feature in residential settings as well.
This guide will answer questions like:
How do you put up a false ceiling? And how is a false ceiling attached?
Table of contents:
- What is a suspended ceiling
- How to install a false ceiling step by step
- What are the requirements for a false ceiling?
- Making the most of your false ceiling installation
What is a suspended ceiling

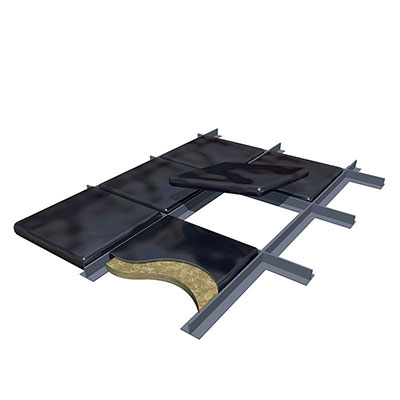
A false ceiling, also known as a suspended ceiling or (especially in North America) a drop ceiling, is a secondary ceiling feature installed underneath the main structural ceiling of a room or building. There are two main types of suspended ceilings – a timber suspended ceiling and a metal suspended ceiling.
What’s the difference between the two?
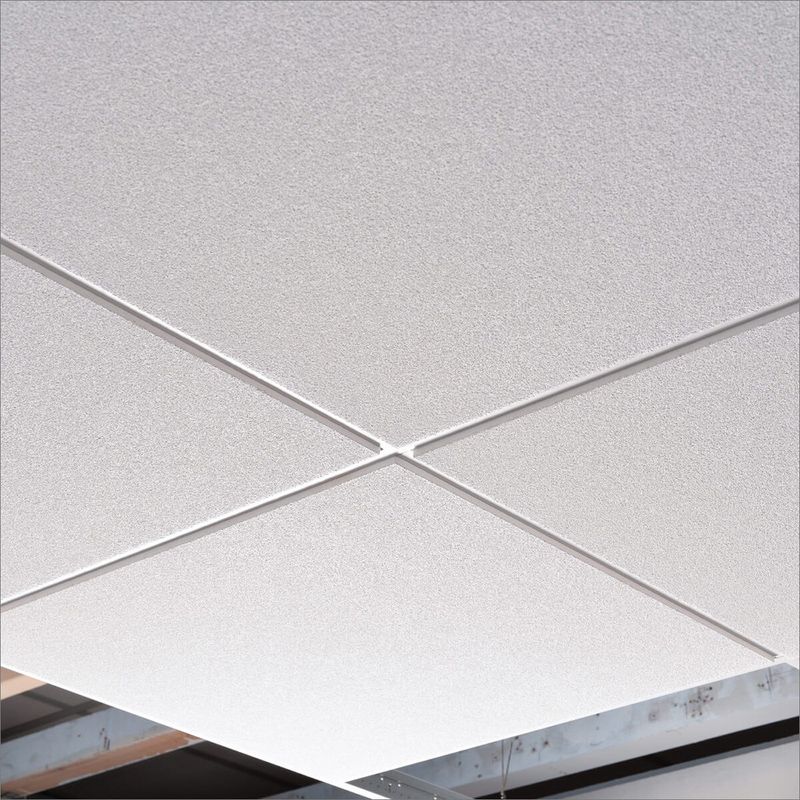
A timber false ceiling consists of a grid framework of timber joists, whereas a metal one is made from metal tracks suspended from the main ceiling using wires or other support systems. Either way, ceiling tiles or panels are then fitted into this grid to create the finished surface.
False ceilings offer several benefits, including:
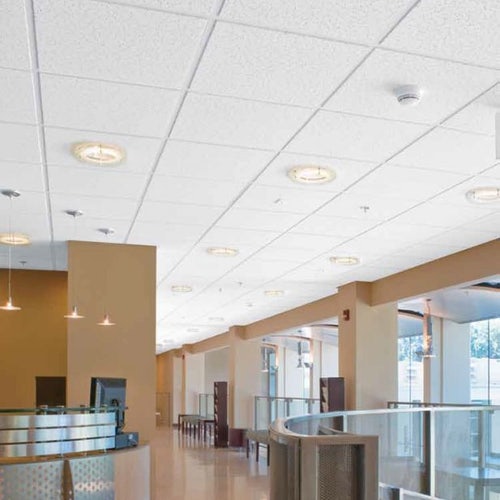
Aesthetic appeal
Installing a drop ceiling can hide unsightly pipes, ductwork, wiring and other utilities that run above the main ceiling, providing a more finished and attractive appearance to the space.
Acoustic control
Certain types of ceiling tiles are designed to absorb sound, improving the acoustics of a room by reducing echoes and noise transmission. Check out our guide on which ceiling tiles are best for soundproofing to find out more.
Thermal insulation
False ceilings can improve energy efficiency by providing an additional layer of insulation between the main ceiling and the room below, helping to retain heat or cool air as needed.
Accessibility
Because ceiling tiles are easily removable, false ceilings provide convenient access to the space above for maintenance and repairs to utilities without requiring major disruption or damage to the main ceiling.
Lighting and ventilation
The grid system of suspended ceilings allows for the installation of various lighting fixtures, air vents and other ceiling-mounted elements with ease, providing flexibility in design and functionality.
How to install a false ceiling step by step
Now that we know all about the various uses and advantages of a modern suspended ceiling, it’s time to find out how to complete our drop ceiling installation!
Suspended ceiling materials and tools you’ll need
When working on any DIY project that involves handling power tools and working at height, always wear appropriate safety gear, including goggles and gloves. Apart from your standard protective gear, you’re going to need the following tools and materials.
Materials
- Ceiling tiles or panels
- Metal grid system (main runners, cross tees, wall angles)
- Suspension wires or rods
- Screws and anchors
- Insulation (if required)
- Access panels (if required)
- Lighting fixtures (if applicable)
Tools
- Tape measure
- Spirit level
- Chalk line
- Drill with appropriate bits
- Appropriate screws/fixings
- Screwdriver
- Tin snips or a cutting tool for metal grid components
- Utility knife
Got everything handy? It’s time to install your false ceiling! Roll up your sleeves, and let’s get cracking!
Step 1: Preparing the space
Clear the room of furniture and any obstacles. Turn off power to any electrical fixtures that may interfere with the installation.
Step 2: Measuring and planning
Measure the dimensions of the room to determine the required quantity of materials. Then, plan the layout of the grid system, considering the location of light fixtures, ventilation and access panels.
Step 3: Installing wall angles
Use a level and chalk line to mark the position of the wall angles along the perimeter of the room.
Carefully attach the wall angles to the walls using suspended ceiling fixings and anchors, ensuring they are level and securely fixed.
Step 4: Installing main runners
Measure and cut the main runners to fit the length of the room.
Next, secure the main runners to the ceiling joists or structure using suspension wires or rods spaced at regular intervals.
Step 5: Installing ceiling grid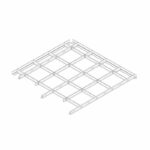
Cut the cross tees to the required lengths to fit between the main runners. Insert the cross tees into the slots on the main runners, forming a grid pattern.
So far, so good!
Step 6: Installing ceiling tiles
Measure and cut the ceiling tiles to fit within the grid. Carefully insert the tiles into the grid, ensuring they are properly supported on all sides.
Step 7: Adding lighting fixtures (optional)
Install any lighting fixtures or other ceiling-mounted components according to the manufacturer’s instructions.
Step 8: Inspecting & adjusting
Check the entire installation for any gaps, misalignments or loose components. Make any necessary adjustments to ensure the false ceiling is level, secure and aesthetically pleasing.
And that’s it – you’re done!
What are the requirements for a false ceiling?
The official requirements for false ceilings in the UK are outlined in BS EN 13964:2014 Suspended ceilings: Requirements and test methods.
Here are the main points you need to bear in mind. For specific figures, make sure you check out the original document.
Fire safety
False ceilings must meet fire safety standards to prevent the rapid spread of fire and smoke within a building. This may involve using fire-resistant materials for the ceiling tiles and ensuring that the installation does not compromise the fire rating of the building’s structure.
Structural stability
The supporting framework for the false ceiling must be designed and installed to withstand the weight of the ceiling tiles, lighting fixtures and any other components. Structural calculations may be necessary to ensure the ceiling can support the intended loads safely.
Acoustic performance
Depending on the application, the suspended ceiling installation may need to provide acoustic insulation to reduce noise transmission between rooms or floors. This could involve selecting ceiling tiles with sound-absorbing properties or incorporating additional insulation layers.
Accessibility
Building regulations often require that access to the space above the false ceiling is available for maintenance and inspection purposes. This might involve incorporating access panels or hatches into the ceiling design.
Electrical and mechanical considerations
If the false ceiling is intended to accommodate lighting fixtures, air vents or other services, electrical and mechanical installations must comply with relevant regulations for safety and performance.

Making the most of your false ceiling installation
When installing a suspended ceiling, it’s crucial to meticulously plan the layout, ensuring proper alignment with existing structures, electrical fixtures and ventilation systems.
Accurate measurements and precise installation of the metal grid components or timber grid are essential for stability and aesthetics.
Plus, regular inspections throughout the process can help you identify and address any issues in good time.
Now that you know how to install a false ceiling, you’re in the best possible place to take on this DIY project while ensuring a successful false ceiling installation that meets both aesthetic and safety standards.
Was this guide useful?
Mentioned in this project guide: