Insulating your loft is one of the most cost-effective things you can do to reduce your heating bills and keep your home feeling warm. Whether you plan on creating a cold or warm loft, our how-to guides will walk you through the process step-by-step. This guide will teach you how to install loft insulation like a pro.
If you haven’t already purchased this and you’re unsure where to start, use our Loft Insulation Buyer’s Guide to make the right choice.
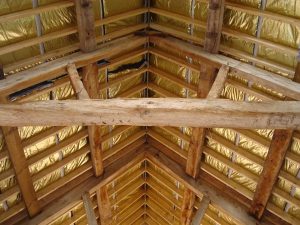
Table of contents:
- Installing loft insulation between joists
- Installing loft insulation in rafters
- Avoiding condensation in the loft
Installing loft insulation between joists
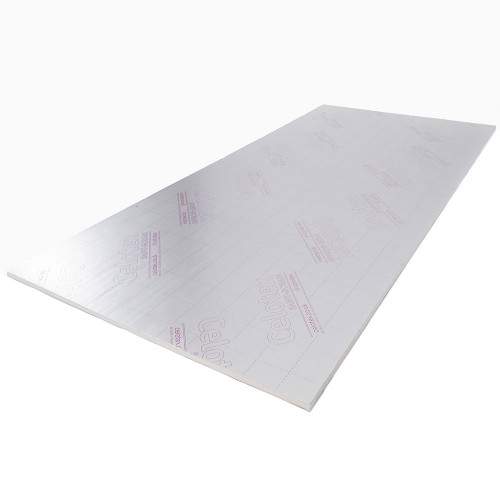
For DIY novices, insulating the joists with loft rolls is the easiest job, particularly if your attic is easy to access. Planning on using rigid insulation board? The process is similar to the one outlined below, but you’ll need a hacksaw to cut the board to fit instead of just sturdy scissors or a knife. Here’s all you need to know.
Step 1. Prepare the loft space
Ensure the loft is safe for you to work in by making sure it’s well-lit. Once you can see properly, have a good look at your joists, checking them for any signs of rot or cracking. If they’re damaged they won’t be safe to walk on and you’ll need to call in professionals.
Now is a good time to clear the loft and vacuum the space to get rid of excess dust. Check to see if any light fittings from the rooms below protrude into the loft. If they do, you’ll need to cover them with downlight caps (also known as downlight covers) which you simply place over the top. These clever caps allow the air around the light fitting to circulate so it doesn’t get too hot.
Make sure you use crawling boards placed between the joists. Loft panels are ideal for this job, and they’ll need to sit across at least three joists to spread the weight evenly. Never step between the joists, or you could end up putting your foot through the bedroom ceiling or worse, falling through completely.

Step 2. Work out how much insulation you need
Grab your tape measure and work out the area you’ll need to insulate by multiplying the width of the floor by the length. Then measure the space in between the joists. Finally, measure the height of the joists themselves. Write these three numbers down as you’ll need them before you buy.
Step 3. Buy your insulation
Decide which type of loft roll you want then choose the thickness you’ll need by using the height measurement of the joists. For example, if your joists are 100mm high, you’ll need to lay down insulation that’s 100mm thick in between the joists first. Then when the surface is even, you’ll lay down more insulation on top which will take you up to the 270mm recommended by the government.
Loft rolls come in different widths, so which one should you choose? Going for the width that’s closest in size to the space within your joists will keep cutting to a minimum. Most joists are placed either 380mm or 570mm apart and most loft rolls are made with those two sizes in mind.
So if the space between your joists is 380mm, look for the roll that’s nearest to this width. If you’re unsure which insulation type benefits you the most then use our Loft Insulation Buyer’s Guide to assess or take advantage of our customer service advisors on 01752 692 206.
Step 4. Grab your equipment
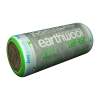
If you’re laying down loft rolls, you’ll need an insulation cutter, sturdy scissors and protective clothing such as overalls, gloves, a mask and some goggles. The exception to this is if you’re using sheep’s wool because it’s not an irritant to the skin.
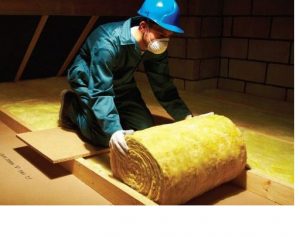
Step 5. Lay the insulation between the joists
Once you’ve insulated between the joists you’ll end up with a nice layer that’s about 100mm thick. Now it’s time to lay more insulation over the top.
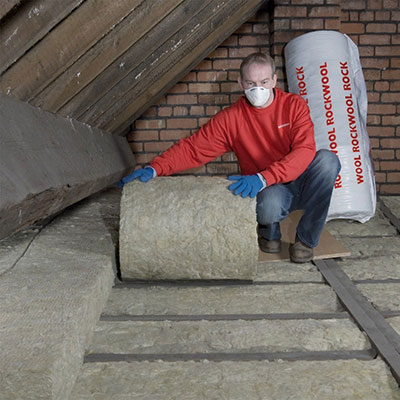
Step 6. Lay the insulation over the top of the joists
Now you have a 100mm layer of insulation between the joists, it’s time to lay more insulation over the top at a 90-degree angle to take it up to the recommended depth of 270mm. Starting from the furthest point from the hatch, spread the insulation over the top of your joists, leaving no gaps between the strips. When it’s time to start a new roll, butt the edges together, but don’t overlap or compress them too tightly.
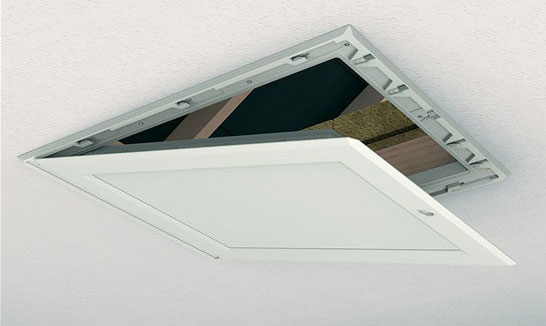
Step 7. Insulate the loft hatch
Experts believe that up to 5% of a home’s heat can be lost if you forget to insulate the loft hatch. To do this, you could staple some insulating material to the inside of the loft hatch door or fix polystyrene with PVA adhesive. To finish, add draught-proof strips on the outside of the hatch to keep things even warmer.
Step 8. Insulate the water pipes and tank
By insulating the joists, you run the risk of pipes and tanks freezing in the cold loft above. You’ll need to fit pipe insulation which you can cut to fit and tape down. Coldwater tanks can be insulated with a tank jacket. Measure your tank to find the right size.
Installing loft insulation in rafters
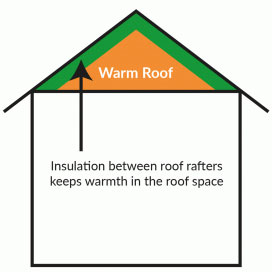
If you want to create a warm loft, perhaps you plan to store precious items or want to use it as a games room, insulating the rafters (the timber or metal beams that support the roof) is the way to go. As shown to the right, a warm roof is a roof where the insulation is between roof rafters.
This means the heat is captured in the roof too to keep that space a suitable temperature. When the insulation is on the floor of the loft, it prevents heat transfer into the loft so the loft remains cold.
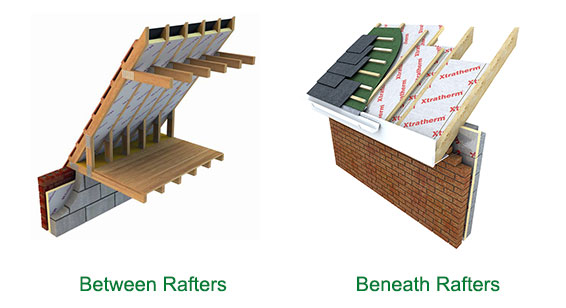
You’ll need to decide whether you’ll insulate between or beneath the rafters. If you don’t care about headroom, insulating beneath them is easiest as it means you don’t have to worry about leaving a gap to allow moisture to dissipate. We’ll cover both methods in our guide.
Step 1. Get started and clear the loft
Make sure the area is safe by installing good lighting. If you don’t have floorboards in your loft, you’ll need to lay down some crawling boards as you’ll be moving around a lot. Check both the rafters and joists for signs of rot, mould or cracking. If they’re damaged the area won’t be safe for you to work in and you’ll need to call the experts.
Step 2. Work out how much rafter insulation you need
Grab your tape measure and measure from the apex of the roof down to the top of the joists, then multiply this by the breadth. If you’re planning on putting insulation between the rafters rather than beneath, you’ll need to measure the distance between the rafters, too. Once you’ve bought the insulation that best suits your needs, you’ll only need a few other bits.

Step 3. Grab your supplies
If you’re using wool insulation, you’ll need an insulation cutter, scissors and protective clothing such as overalls, gloves, mask and goggles. Planning on using insulation boards? You’ll need to put a drill, saw and nail gun on your shopping list. If you’re insulating between the rafters, you’ll need plenty of wooden battens too.
Step 4. Start to insulate either under or between rafters
How to install loft insulation beneath the rafters
The easiest way to insulate the roof is to install rigid boards or foil insulation beneath the rafters as you don’t have to worry about leaving any gaps to allow the air to circulate. This may not be an option if the space is tight because it will eat into the available headroom.
For rigid insulation boards, work out how you’ll cover the space in advance, then cut your boards to fit. Using your nail gun, fix them to the underside of the rafters. Then just leave them as they are, or cover them up with plasterboard if you don’t like the unfinished look.
Using multifoil insulation is even easier (although it does provide less thermal insulation). Starting on one side of the loft, simply staple the foil to the underside of the rafters, unrolling and stapling as you go. Once you get to the other side, you can either go back on yourself again or move the foil up or down until you’ve covered the whole area.
How to install loft insulation between the rafters
Putting insulation between the rafters is slightly more tricky, as you need to leave a gap of about 50mm between the insulating material and the membrane of the roof. Fail to do so and you could get condensation because there’s nowhere for the damp air to escape to. To make sure you leave enough of a gap, fix wooden battens to the rafters using a nail gun.
The depth of your insulation will be dictated by the depth of your rafters. Worried this won’t give you enough to make the loft warm? Fixing wooden extensions could help you achieve the recommended 270mm depth.
If you plan to insulate with wool rolls, put on your protective clothing and lay out your material. Starting from the top, staple the insulation to the sides of the rafters until the whole space is covered, using the battens as your guide to your 50mm gap. To stop bits from falling off when you’ve finished, add a layer of netting.
Using insulation boards? It’s a slightly trickier job than wool as your measurements need to be more precise. Cut the boards to fit the gap between the rafters, then staple down the edges.
Avoid condensation in your loft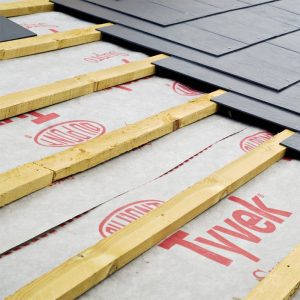
Condensation can be a problem in both warm and cold lofts. Wood and water really don’t mix and it’s something which, left untreated, could see the timbers rotting.
When the warm moist air from showering, drying clothes, cooking and even breathing rises, it gets trapped in your loft if it’s not well-ventilated. Whenever the warm vapour hits a cold surface, it turns back into water, forming droplets.
There are several ways you can help reduce this. Sheep’s wool insulation is a great choice for damp spaces because its natural fibres help to draw out moisture. Another good option is to install a breather membrane between the roof and the rafters which allows the air to flow, reducing the risk of condensation.
Finally, fitting roof ventilation can be a quick but effective solution – a bit like opening one of the windows in your car when it’s misting up inside.

Was this guide useful?
Mentioned in this project guide: