Trying to make a home more energy efficient can take a lot of time and money to set up. As a result, this can become a barrier to many property owners.
However, the long-term benefits and cost savings of insulating your property are undeniable. Pipe insulation is one product which provides a cheap, simple fix for what is one of the most basic levels of insulation.
So, it should come as no surprise that this makes it a good starting point or top-up for anyone wanting a more efficient home.
While pipe insulation is sometimes referred to as Armaflex, this is actually a brand name The terms are somewhat used interchangeably because. Armaflex is considered by many as the ‘hoover’ of pipe insulation.
With that in mind, let’s find out how to use Armaflex and what it’s benefits are!
Table of contents:
 What are the benefits of pipe insulation?
The primary benefits of pipe insulation include reducing convective heat loss, increasing the delivered water temperature by around 4 degrees, and allowing the property’s water heater to be turned down to save energy.
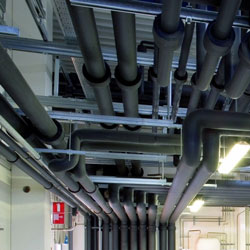
In the first place, making sure that pipes are insulated in exposed areas of the home or garage will save money on energy bills. This is especially true if you live in an area with extremely low winter temperatures.
Water pipe insulation will also significantly reduce the risk of pipes becoming frozen or breaking. A good example of this (and something which not everyone considers) is when you insulate a loft space. If you insulate a roof, the home becomes warmer but you will normally find that this makes a loft space colder.
Pipes and water tanks are therefore susceptible to freezing or breaking. So, pipe insulation helps to prevent what could become a very expensive emergency. Water pipe insulation also stops pipes from sweating, which can cause damage where the moisture accumulates in the building’s structure.
 What is Armaflex pipe insulation?
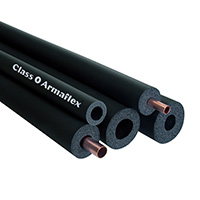
Class O Armaflex is the expert flexible insulation for secure condensation control. With its inbuilt water vapour barrier, Armaflex is particularly effective at preventing moisture buildup and ensuring sustainable thermal efficiency.
The water vapour membrane built into Armaflex comes from its closed cell structure. Armaflex contains thousands of interlocking closed cells, each with an essential resistance to water access. As such, the vapour barrier of Armaflex cannot be compromised by surface punctures or tears.
How to use Armaflex
Now that you know what the main features of Armaflex are, let’s take a closer look at how to install Armaflex pipe insulation:
Step 1: Measure the pipe
Begin by measuring the length of the pipe that requires insulation. Ensure to measure accurately to determine the correct size of Armaflex pipe insulation needed.
Step 2: Cut the pipe sleeve
Using a sharp utility knife or scissors, cut the Armaflex pipe sleeve to the required length based on the measurements taken in the previous step. Make a vertical cut along the length of the sleeve, allowing it to open up.
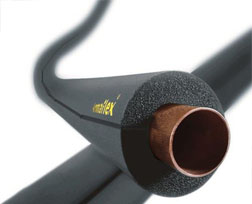
Step 3: Place the pipe sleeve
With the vertical cut seam facing outward, carefully wrap the Armaflex pipe sleeve around the pipe. Ensure that the sleeve fits snugly and covers the entire length of the pipe.
Step 4: Secure the sleeve
Once the Armaflex pipe sleeve is positioned correctly on the pipe, secure it in place using tape or a cable tie. Make sure that the sleeve is tightly secured to prevent any gaps or movement.
Step 5: Check for proper insulation
After securing the sleeve, double-check to ensure that there are no gaps or openings in the insulation. Proper insulation is essential for effective thermal and acoustic performance.
Step 6: Repeat if necessary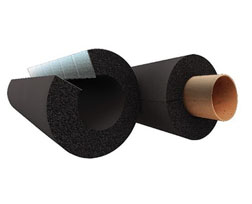
If insulating multiple pipes, repeat the above steps for each pipe, measuring, cutting, placing, and securing the Armaflex pipe insulation accordingly.
Step 7: Inspect the installation
Once all pipes are insulated, inspect the installation to ensure that each sleeve is securely attached and properly sealed. Address any areas that may need additional reinforcement or adjustment.
Following these straightforward steps, you should have not trouble installing Armaflex pipe insulation.
Congratulations – you’ve now provided long-term thermal protection and helped prevent energy loss in your plumbing system!

Was this guide useful?
Mentioned in this product guide: