External wall insulation is a great way to reduce heat loss and improve the building envelope. Builders generally constructed buildings before the 1930s with solid walls, meaning they did not include cavities for insulation.
Table of contents:
- Where to find insulation for external walls
- How to install external wall insulation
- The benefits of external wall insulation
Where to find insulation for external walls
Here at Insulation Superstore, we have a range of external wall insulation boards. Choose from the popular Kingspan Kooltherm external wall insulation, Diffutherm insulation boards, Diffuboard insulation boards or Pavatherm insulation boards.
How to install external wall insulation
Here are the step you need to follow when installing external wall insulation.
Step 1: Render test
The first step before beginning the external wall insulation installation process is to carry out a render test. This will identify whether the existing render is strong enough to support the insulation. If the render is strong enough, you can simply smooth it so that you can apply the insulation directly onto it. If it is not strong enough, you must remove all existing render before installing the insulation.
Step 2: Remove and adjust pipework
After testing and smoothing or removing the render as needed, you must remove all pipework from the building before starting the installation process. Install temporary downpipes to prevent water from running down the sides of the building, and either remove or extend any waste or soil pipes away from the walls. This allows the building to function normally during installation.
Step 3: Protect windows
Often, professional companies will also fit a protective layer or film over your windows and doors, which will prevent them from being damaged during the installation process.
Step 4: Fitting a starter track
Before the installation begins, it is important to decide at what height you’d like the insulation to begin. External wall insulation does not normally reach the ground but instead begins a few inches or feet above. Once you’ve decided on the height, this is where the aluminium start track, or carrier tray, will be installed. This creates a level starting point and can also be used to fit beading.
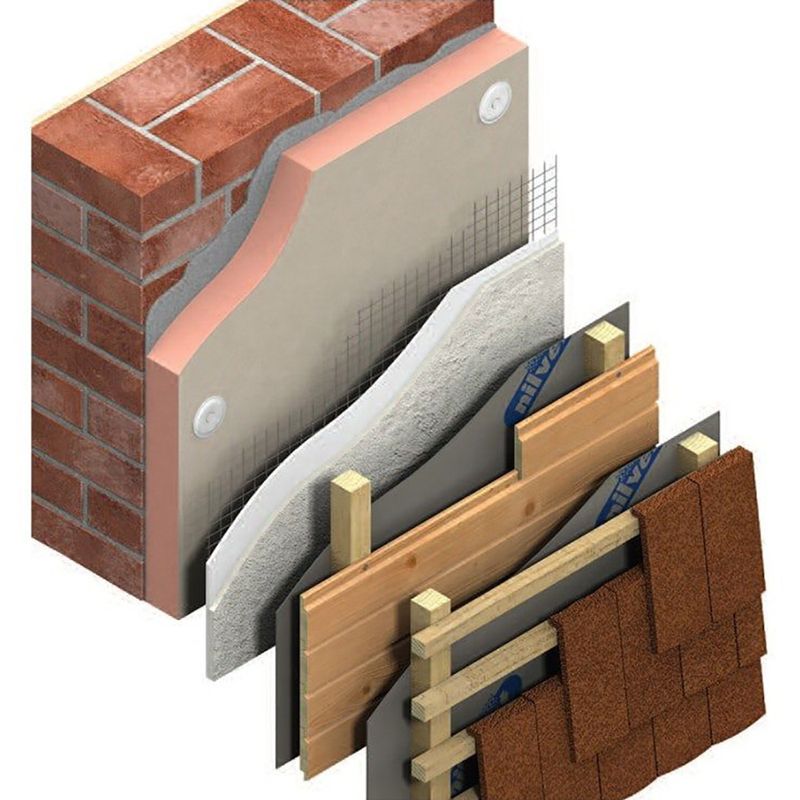
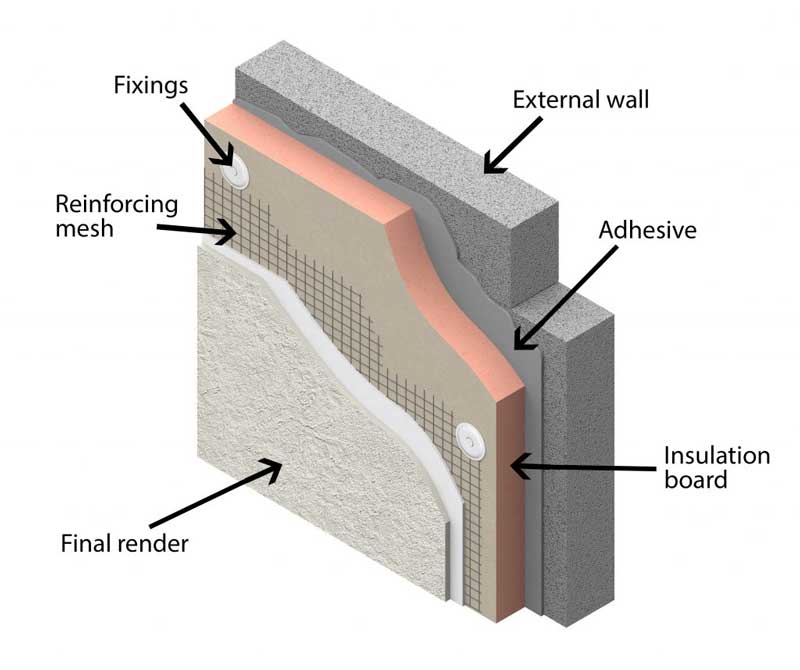
Step 5: Installing insulation boards
After you install the starter track, you can begin applying the insulation boards to the wall. Apply a layer of adhesive to each board, then stick them onto the wall in a staggered pattern. Cut the insulation boards to fit around windows and other obstructions as you go.
Once the insulation boards have been installed, a rasp is used to file off the edges of the boards where required, in order to ensure the surface is completely flat.
Step 6: Adding mechanical fixings
As well as the adhesive, mechanical fixings are also used to secure the insulation boards. Around 10 fixings are hammered in per square metre, to ensure the insulation boards will not get blown off or fall off during periods of bad weather.
 Step 7: Adding beading
Corner beads and stop beads are a great way to ensure the insulation remains secure and tight around windows, doors and other obstructions, creating neat and tight edges and preventing the insulation from touching other materials.
Step 8: Adding reinforcing mesh and render
Once the boards and beading have all been installed, two layers of render with strengthening properties are applied, with a fibreglass mesh sitting between the two layers of render.
Step 9: Applying primer
After you install the strengthening render and reinforcing mesh, you can paint on a primer. This primer often contains granules that help the final render coat stick. You should also colour-match the primer to the final render to ensure that no colours show through.
Step 10: Applying the final render
The final coat of render can now be applied. This render is the last coating in the installation process, meaning that it is important to choose the exact colour and texture you like, as it will be in view on the outside of the building.
Step 11: Reinstalling pipework
You can now reinstall all the pipework and other fixtures that you originally removed from the walls, and you should seal all openings where pipework extends through the render.
After installing the external wall insulation, you may need to make your window sills deeper to accommodate the thicker walls. You can do this by using a window sill extension or by adding new, wider sills on top.
Additionally, you may require new or extended verge trims where the roof meets the wall to extend over the newly widened wall.
The benefits of external wall insulation
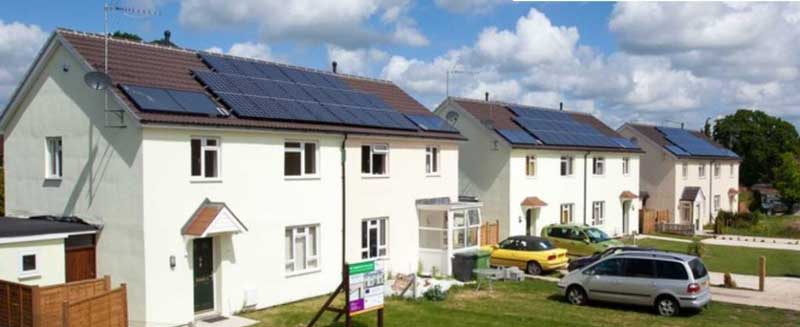
External wall insulation provides numerous benefits, including improved thermal performance of buildings, resulting in reduced heat loss and lower energy bills.
It also helps to regulate indoor temperatures, making homes more comfortable in both summer and winter.
Additionally, external wall insulation can enhance the appearance of buildings, provide weatherproofing and contribute to reducing carbon emissions, thus promoting environmental sustainability.
And now that you know how to install external wall insulation and what it’s benefits are, you’re ready to consider this project.

Was this guide useful?
Mentioned in this project guide: