Underfloor heating is all the rage these days – and with good reason.
But did you know underfloor heating is actually an ancient invention that has been around for 7000 years, making its debut in Neolithic Korea?
Mind – blown!
And if you’re thinking about installing underfloor heating, you’re in good company.
There are plenty of questions, though.
Such as:
Can I install underfloor heating myself?
How hard is it to install underfloor heating?
To answer them – and more – at Plumbing Superstore, we decided to take a deep dive into the ins and outs of how to install underfloor heating.
Here’s what our underfloor heating installation guide has in store for you.
Table of contents:
- How much is underfloor heating to install?
- How to install underfloor heating step by step
- Final thoughts
How much is underfloor heating to install?
You might be wondering:
Is it expensive to install underfloor heating?
And if you can’t do it yourself, how much will underfloor heating installation set you back?
Here’s the scoop:
Most professionals are likely to charge around £120 – £135 per m² for wet underfloor heating installation in a new build and possibly as much as £135 – £185 in a renovation.
Yes, that’s a lot!
The good news is:
You can lay underfloor heating by yourself with the help of a few handy tips!
How to install underfloor heating step by step
Underfloor heating in the UK is suitable for use with a wide variety of floors. However, as it’s most commonly fitted in concrete floors, this is what we’re going to focus on.
These are the steps you need to follow.

Step 1: Prepare the floor
Clean the surface and remove any old flooring that might be in place. Then, fit polyurethane edge insulation along the walls, and sheets of insulation on the floor itself. This will help you retain as much heat as possible and prevent any moisture and mould from affecting your underfloor heating system.
Pro tip: Don’t forget to tape all the joints between the sheets.
You’ll also need to mark areas where you intend to place furniture, as you can’t put heavy items on top of underfloor heating.
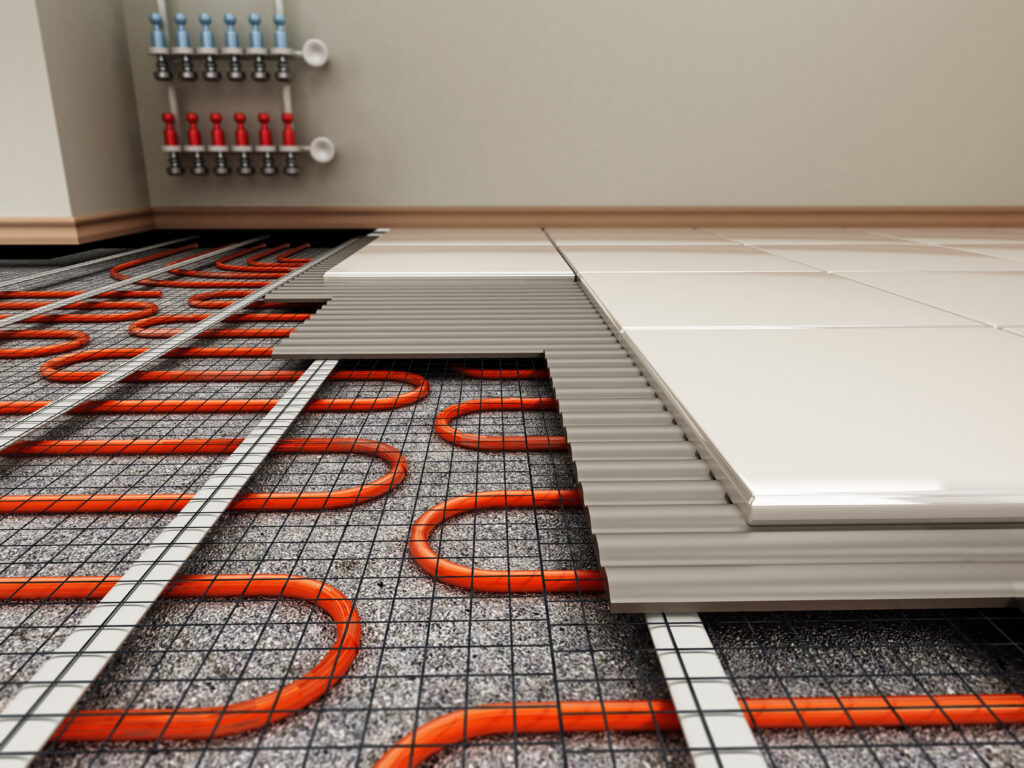
Step 2: Fit a plastic membrane
When using a wet screed – which is the most popular option by far – you need to lay out and secure a plastic membrane for additional protection.
Step 3: Assemble the manifold
Put together the manifold and install it to the wall as per the manufacturer’s instructions. To do so, you’ll need a drill, self-tapping screws, wall plugs and a rubber mallet. Use a spirit level to ensure the manifold is level before proceeding to the next step.
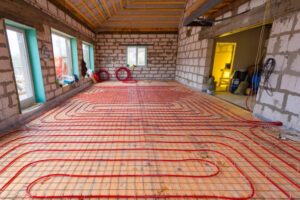
Step: 4: Lay the pipes
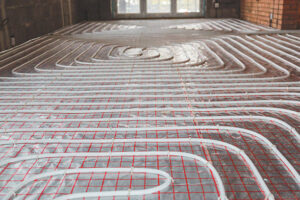
Now comes the fun part – laying underfloor heating pipes!
Make sure you refer to the manufacturer’s instructions for specific pipe lengths and pipe spacing. While the typical pipe spacing is 200mm, this figure is likely to vary slightly from brand to brand.
Having done that, connect the pipe to the flow manifold and begin to lay it out from the outside in. Basically, you’re aiming for the equivalent of concentric circles.
Pro tip: Use a tacker gun to attach the pipe clips, as it will save you plenty of time and effort. Make sure they’re affixed at regular intervals.
Step 5: Pressure test
Pressure testing is a key step in the installation process, as that’s the only way you can detect any mishaps.
Here’s how you should go about it:
Make sure the manifold isolation valve is closed, and then open all circuits. Connect a test pump, raise the pressure and check for any pressure losses. Adjust the pipework accordingly.
Step 6: Pour the screed
We recommend using a self-levelling screed at a minimum thickness of 50mm. Once poured, allow it to dry for at least seven days. When the screed is fully dry, you can fire up your underfloor heating. You should start with a low temperature and increase it only gradually over a few days.
As long as everything is functioning normally, you can go on to complete your flooring and start enjoying your hot water underfloor heating.
Final thoughts
Installing underfloor heating from scratch might seem like a tall order, but it’s perfectly within the grasp of a seasoned DIYer – and that means you!
What’s more:
A highly energy-efficient underfloor heating system will save you tonnes of money on your energy bills! Given the ongoing cost of living crisis, it’s a shrewd investment.
So, isn’t it high time you considered your underfloor heating options? Now that you know how to install underfloor heating, you don’t have an excuse not to.

Was this guide useful?
Mentioned in this project guide: